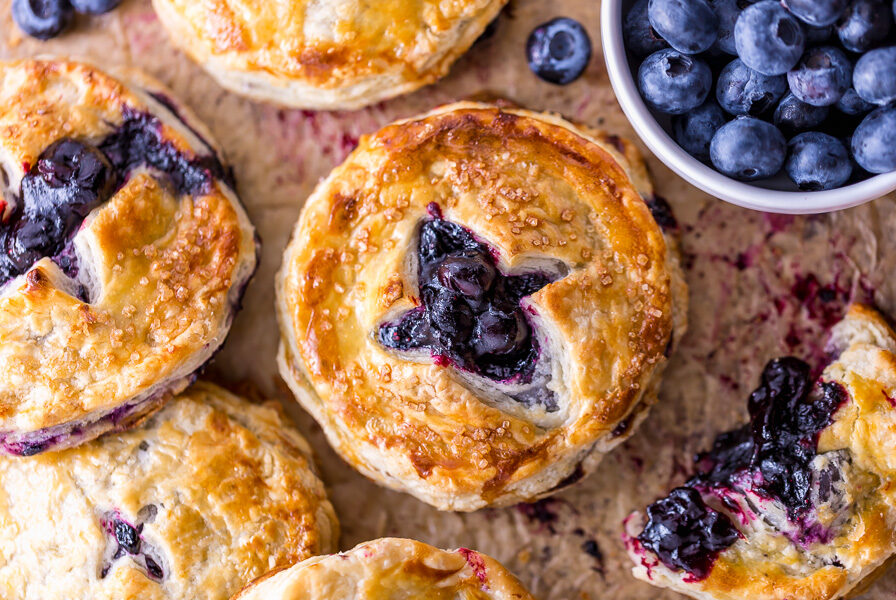
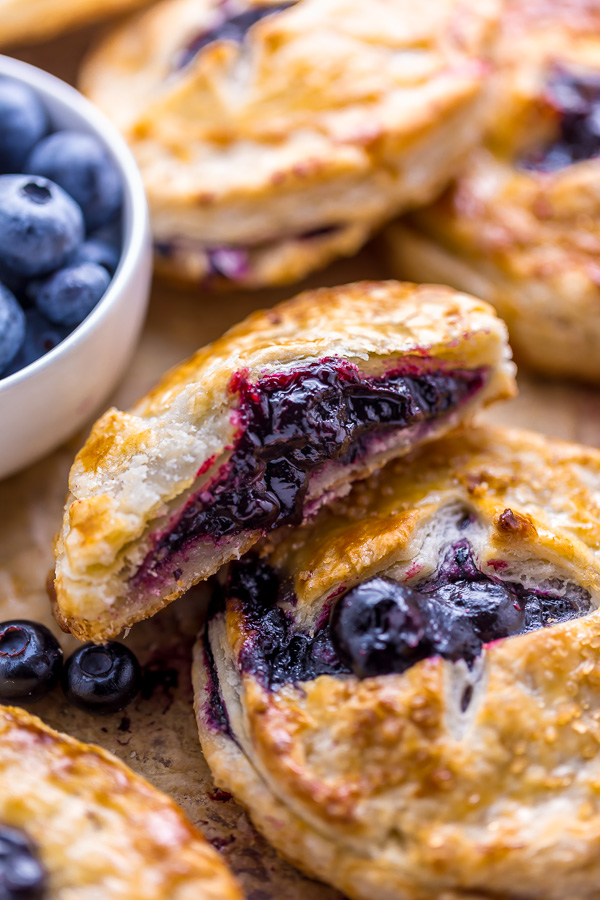
These Blueberry Hand Pies bake up golden brown and oozing with juicy blueberry filling! Perfect for serving a crowd. And so much easier than traditional blueberry pie! Try must also try no bake lemon tarts!
Ingredients:
For the Crust:
- 2 cups all-purpose flour
- 1/2 teaspoon salt
- 3/4 teaspoon baking powder
- 1 ans 1/2 tablespoons granulated sugar
- 2 sticks (8 ounces) VERY cold, unsalted butter, cut into cubes
- 1/2 cup cold FULL FAT sour cream
For the filling:
- 2 cups blueberries, fresh or frozen
- 1/4 cup granulated sugar
- 1 and 1/2 tablespoons cornstarch
- 1 tablespoon fresh lemon juice
For the topping:
- 1 large egg, beaten
- Turbinado sugar, optional
Instruction:
To make the crust:
- In a large bowl whisk together the flour, salt, baking powder, and sugar.
- Add the butter, working it in with your hands or a pastry cutter, until it’s a coarse meal. The butter should still be in large, pea-sized pieces.
- Using a rubber spatula, stir in the sour cream. The dough will be very shaggy at this point. Turn it out onto a well floured work surface, and bring it together with a few quick kneads.
- Pat the dough into a 10 inch log, then roll it out into a 10″ x 12″ rectangle. Dust both sides of the dough lightly with flour, and starting with the shorter end, fold it in three – like a letter. Flip the dough over, and roll it again into a 10″ x 12″ rectangle. Fold it in three again. Wrap the dough in saran wrap, and chill for 1 hour.
To make the blueberry filling:
- Combine all of the ingredients in a saucepan; bring to a simmer over medium-heat. Cook until the mixture starts to thicken, about 6 minutes. Transfer the blueberry filling to a bowl and let cool to room temperature.
Assembly and cooking:
- Preheat the oven to 425°(F). place a rack on the middle shelf. Line a large baking sheet with parchment paper.
- Roll the dough into a large square, about 16″ x 16″. For square pies, use a pastry wheel or pizza cutter to cut out sixteen even squares. For round pies, use a 4″ biscuit cutter (or something round like the top of a martini or wine glass) to cut out 16 circles.
- Divide the cooled filling among eight of the squares (or circles), using about two tablespoons for each. Brush a little bit of the beaten egg wash along the edges of each filled square (or circle).
- Using a small knife, cut a vent into each of the remaining eight squares (or circles).
- Top each filled square (or circle) with a vented square (or circle), and press along the edges with the fork or a pie crust crimper. Make sure the edges are sealed well!
- Brush the top of each pie with the remaining beaten egg, and sprinkle with sugar, if using.
- Transfer the pies to prepared baking sheet.
- Bake the pies for 20 minutes. Remove them from the oven, and let cool for 20 minutes before serving.
Recipe Notes
- This pie is mainly made up of chocolate – so use the best stuff you can get your hands on! I strongly suggest quality chocolate you know melts well and tastes good. I love 70% cocoa bars for this recipe! Whatever brand you choose, just be sure you’re using real chocolate, and not chocolate chips.
- For the best flavor, be sure to choose bittersweet chocolate or semi-sweet chocolate. I don’t recommend using milk chocolate, which will yield a cloyingly sweet filling.
- The crust for these mini mint chocolate cream pies is made from crushed Oreo cookies and melted butter. You do NOT need to remove the filling from the Oreo cookies before crushing them up.
- When it comes to crushing up your Oreo cookies, you have a few options. If you own a food processor or high-powered blender, you can simply place them in the body of the machine and pulse until the cookies are in fine crumbs. You may also crush them manually, by placing the cookies in a large ziplock bag, and rolling over them with a rolling pin or wine bottle. Just make sure all of the cookie bits have been finely crushed! Otherwise they won’t hold together.
- It’s very important to freeze the crusts for at least 30 minutes before you add the filling.
- Once you add the filling, the mini pies will need to go back in the fridge for at least 2 hours. So be sure to plan ahead time wise.
- Be sure to remove the pies from the pans before you add the whipped cream and chocolate ganache. The pans should easily slip off with very little effort, however if you find they’re being stubborn and don’t want
- Not a fan of mint? No problem! Simply omit the mint extract wherever it’s called for, and you’ll have chocolate mousse tartletts instead!
- I DO suggest using the espresso powder no matter what! It won’t make your dessert taste like coffee – promise! It just adds a really nice depth of flavor and makes the chocolate POP a little more.
- While I have not personally tried making this recipe in a full size pie pan, it should work in an 8″ or 9″ regular pie dish.
- In my opinion, freshly whipped cream is a must for this recipe! Canned whipped cream or cool whip just doesn’t do it justice. That said, obviously both will “work” in a pinch. Do what best works for your lifestyle
website: bakerbynature.com